ポストプロセスを通じて、fragment shaderをいじってフィルターを作っていこうと思います。デモとして、グリッチフィルターを作成いたしました。備忘録も含めて、いろいろなテクニックを紹介していこうと思います。今回は、画像処理の2回目、スクリーン(画面)編です。
【Demo】misora.main.jp/post-glitch/
1.PostProcessingの下準備
threejs.org

自作のポストプロセッシングするための準備です。まず、何もエフェクトがかかっていない真っさらな状態を作成します。ひとつ、three.jsのフォルダからshaderPass.jsをコピーして、設定を追加します。
three.js
import { EffectComposer } from 'three/examples/jsm/postprocessing/EffectComposer.js';
import { RenderPass } from "three/examples/jsm/postprocessing/RenderPass";
import { ShaderPass } from './ShaderPass.js';

import Vertex from "./vertex.glsl";
import Fragment from "./fragment.glsl";
const effectComposer = new EffectComposer( renderer );
//
effectComposer.addPass(new RenderPass(scene, camera));
effectComposer.setPixelRatio(Math.min(window.devicePixelRatio, 2.0));
effectComposer.setSize( window.innerWidth, window.innerHeight );
//1)My PostProcessing Shader
const PostProcessingShader = {
uniforms: {
tDiffuse: { type:"t", value:null },
time: { value: 0.0 },
//
u_resolution: { value: new THREE.Vector2(window.innerWidth, window.innerHeight)},
},
vertexShader: Vertex,
fragmentShader: Fragment,
};
const MyEffectPass = new ShaderPass(PostProcessingShader);
effectComposer.addPass(MyEffectPass);function rendeLoop() {
//stats.begin();//stats計測
//renderer.render(scene, camera) // render the scene using the camera
effectComposer.render();
requestAnimationFrame(rendeLoop) //loop the render function
//stats.end();//stats計測
}
rendeLoop() //start renderingvertex.glsl
/*vertex.glsl*/
varying vec2 vUv;

void main() {
    vUv=uv;
    gl_Position = projectionMatrix * modelViewMatrix * vec4( position, 1.0 );
    // vec4 modelPosition = modelMatrix * vec4(position, 1.0);
    // vec4 viewPosition = viewMatrix * modelPosition;
    // vec4 projectionPosition = projectionMatrix * viewPosition;
    // gl_Position = projectionPosition;
}
fragment.glsl
/*fragment.glsl*/
uniform sampler2D tDiffuse; /*表示される画像*/
uniform float time;
varying vec2 vUv;

void main() {

 	vec2 uv = vUv;
	vec4 bg_color =  texture2D(tDiffuse, uv);


	////////////////////////////////////////////////////////////////////////////////////////
	// 出力
	gl_FragColor = vec4(bg_color);

}
ShaderPass.js
import { ShaderMaterial, UniformsUtils } from 'three';
import { Pass, FullScreenQuad } from 'three/examples/jsm/postprocessing/Pass.js';

class ShaderPass extends Pass {

	constructor( shader, textureID ) {

		super();

		this.textureID = ( textureID !== undefined ) ? textureID : 'tDiffuse';

		if ( shader instanceof ShaderMaterial ) {

			this.uniforms = shader.uniforms;

			this.material = shader;

		} else if ( shader ) {

			this.uniforms = UniformsUtils.clone( shader.uniforms );

			this.material = new ShaderMaterial( {

				name: ( shader.name !== undefined ) ? shader.name : 'unspecified',
				defines: Object.assign( {}, shader.defines ),
				uniforms: this.uniforms,
				vertexShader: shader.vertexShader,
				fragmentShader: shader.fragmentShader

			} );

		}

		this.fsQuad = new FullScreenQuad( this.material );

	}

	render( renderer, writeBuffer, readBuffer, deltaTime, /*, deltaTime, maskActive */ ) {

		if ( this.uniforms[ this.textureID ] ) {

			this.uniforms[ this.textureID ].value = readBuffer.texture;

		}
  // Add
		if ( this.uniforms[ 'time' ] ) {

			this.uniforms[ 'time' ].value += deltaTime;

		}
    //

		this.fsQuad.material = this.material;

		if ( this.renderToScreen ) {

			renderer.setRenderTarget( null );
			this.fsQuad.render( renderer );

		} else {

			renderer.setRenderTarget( writeBuffer );
			// TODO: Avoid using autoClear properties, see https://github.com/mrdoob/three.js/pull/15571#issuecomment-465669600
			if ( this.clear ) renderer.clear( renderer.autoClearColor, renderer.autoClearDepth, renderer.autoClearStencil );
			this.fsQuad.render( renderer );

		}

	}

	dispose() {

		this.material.dispose();

		this.fsQuad.dispose();

	}

}

export { ShaderPass };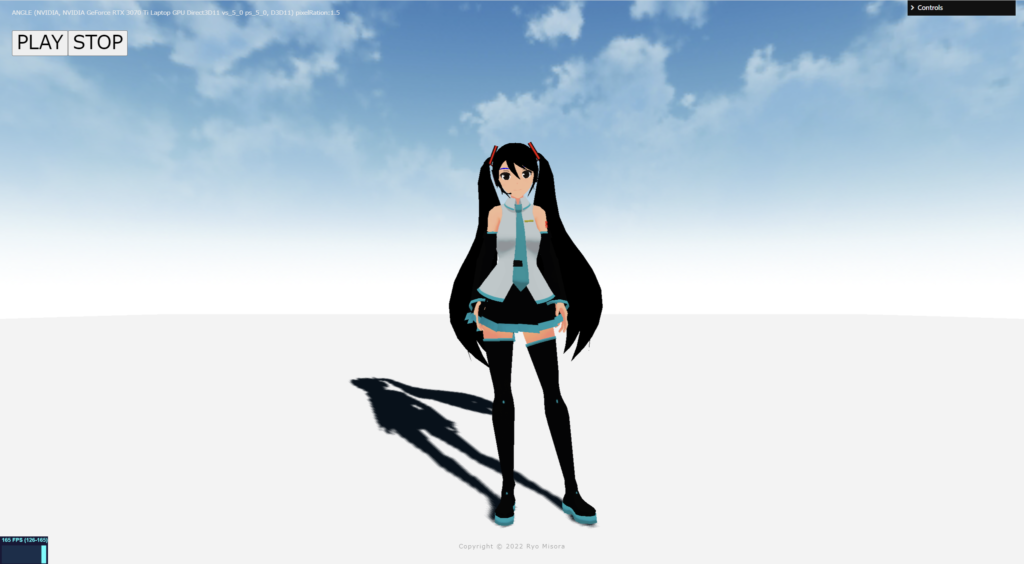
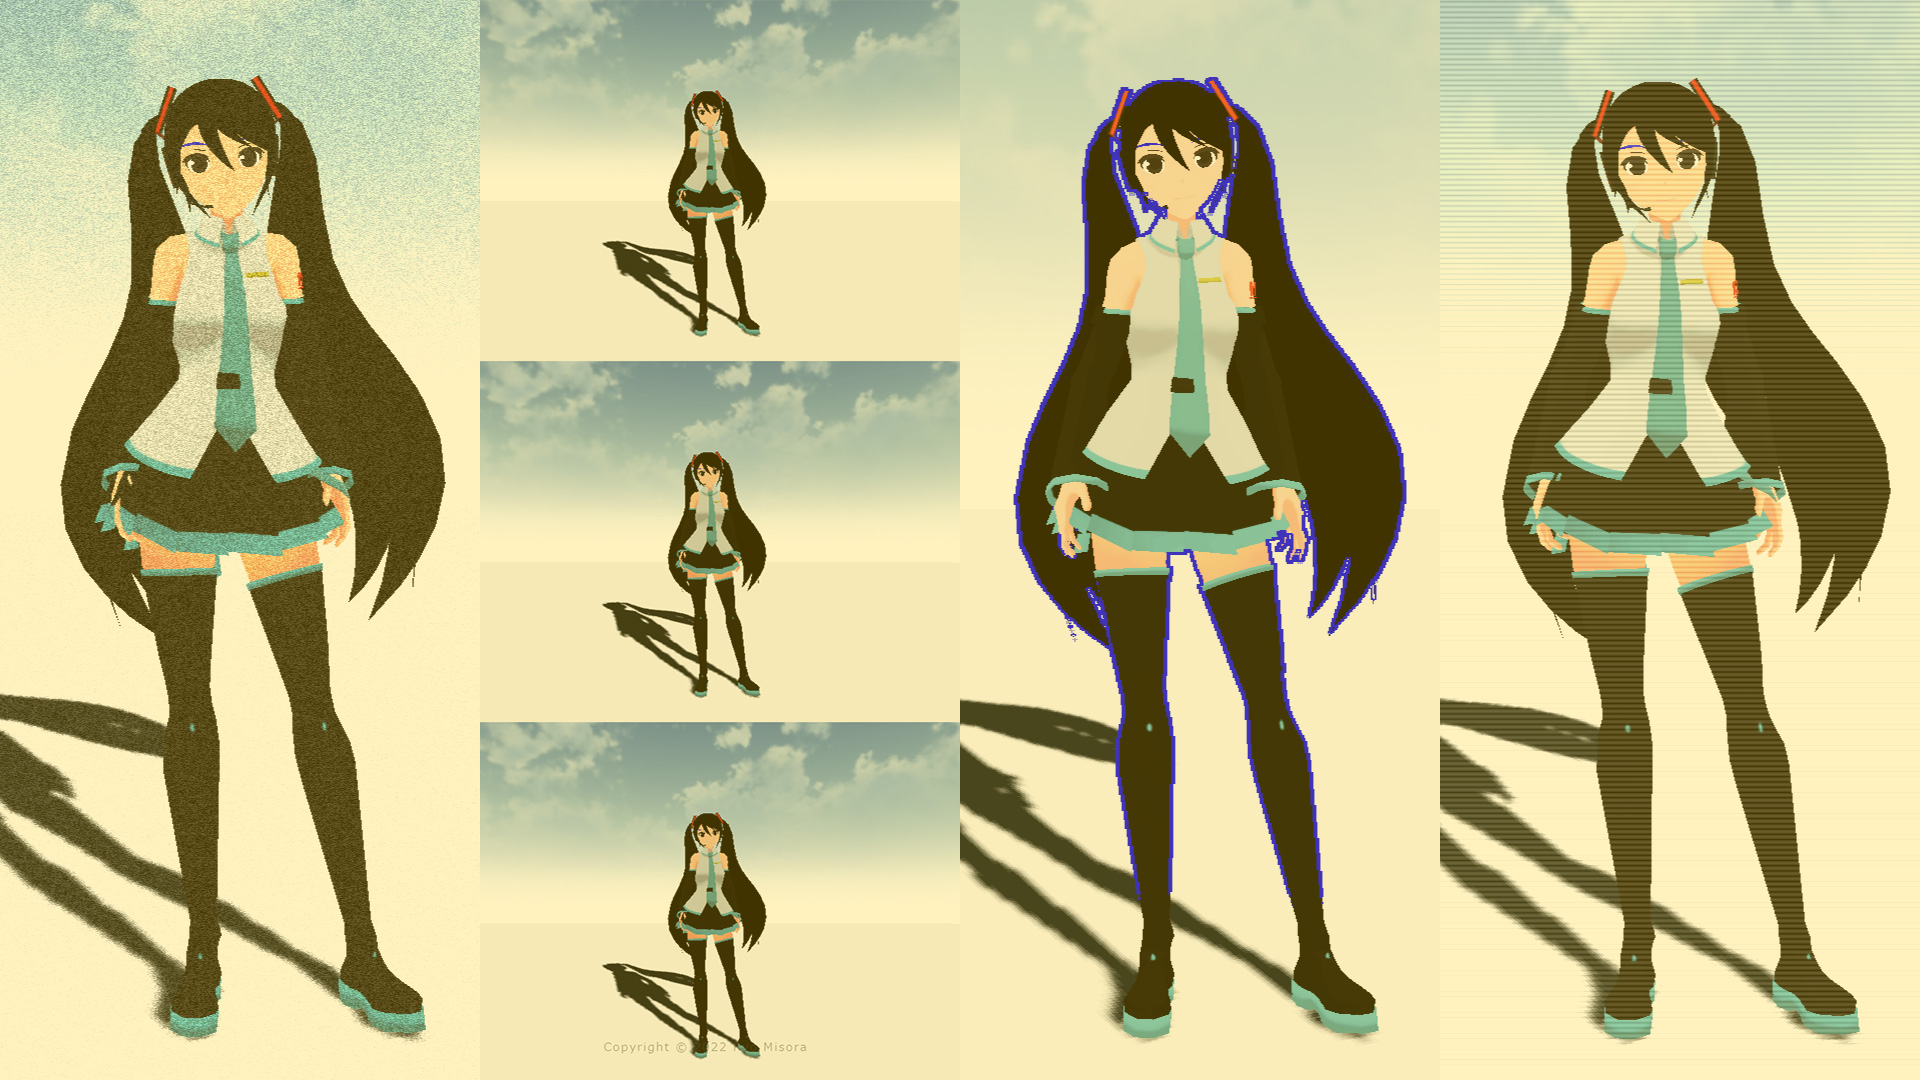
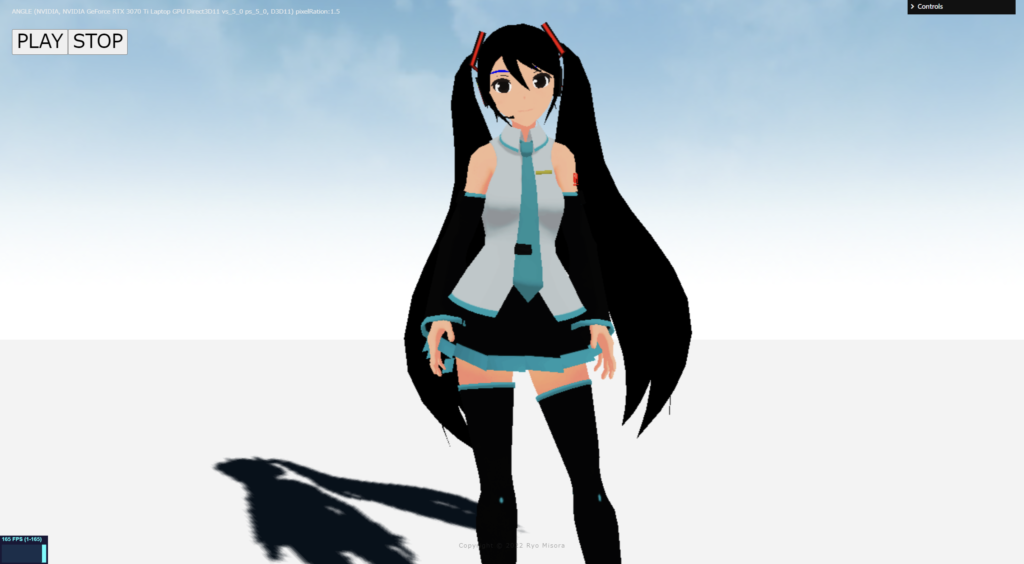
何もエフェクトを設定していない、素の状態が完了しました!
2.スクリーンテクニック
ポストプロセッシングで、おこなうまでもないエフェクトも紹介しています。最終的にはそれらを掛けわせることで、複雑な表現が可能になると思っています。さまざまな表現方法がありますが、今回はスクリーン(画面)を変化させることに焦点を当てて紹介します。
以下のサイトを参考にさせていただきました。


Split screen

スクリーンを分割するものです。uStepを変更することで、分割数を変更できます。
fragment.glsl
/*fragment.glsl*/
uniform sampler2D tDiffuse; /*表示される画像*/
uniform float time;
varying vec2 vUv;

//uniform float uStep;

void main() {
 	vec2 uv = vUv;

	//画面分割
	float uStep = 3.0;
	uv = mod(uv*uStep, 1.0);

    vec4 bg_color = texture2D( tDiffuse, uv);

	// 出力
	gl_FragColor = vec4(bg_color);
}
WhiteNoise

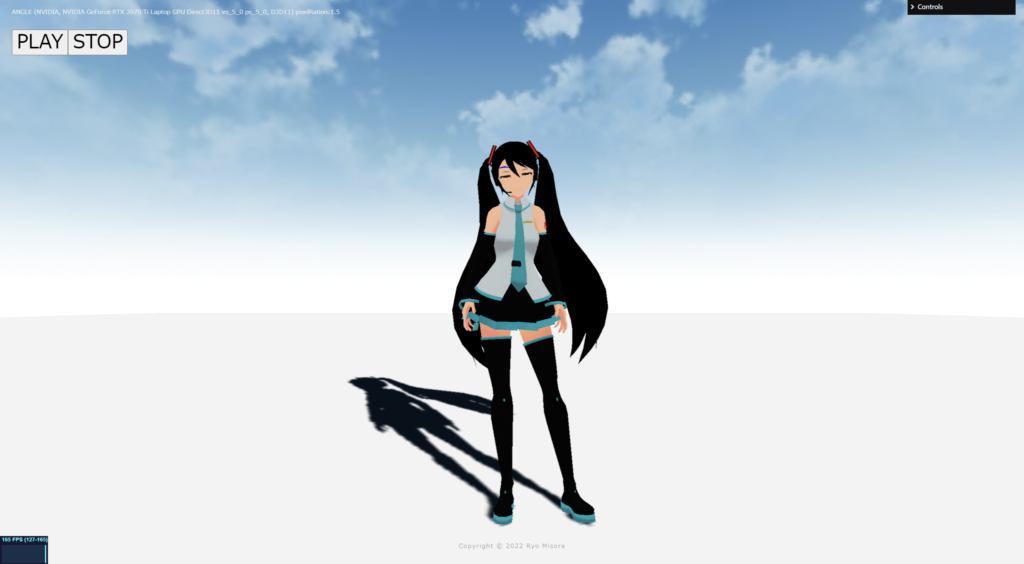
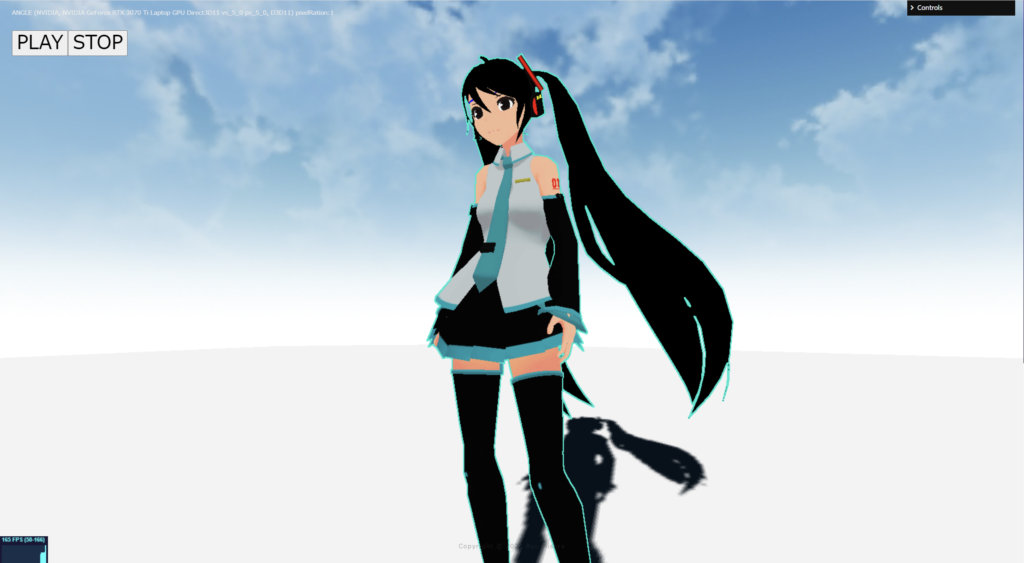
ノイズを載せています。静止画などに使うと動いている感を演出できます。
fragment.glsl
/*fragment.glsl*/
uniform sampler2D tDiffuse; /*表示される画像*/
uniform float time;
varying vec2 vUv;

//ランダムノイズ(ホワイトノイズ)
//float random (vec2 coord) {
//    return fract(sin(dot(coord.xy, vec2(12.9898,78.233))) * 43758.5453123);
//}

highp float random (vec2 co){
    highp float a = 12.9898;
    highp float b = 78.233;
    highp float c = 43758.5453;
    highp float dt= dot(co.xy ,vec2(a,b));
    highp float sn= mod(dt,3.14);
    return fract(sin(sn) * c);
}

void main() {
 	vec2 uv = vUv;

	vec4 texcel = texture2D( tDiffuse, uv);

	// Noise(WhiteNoise)
	float w_noise = random(vec2(uv + time));
	vec4 bg_color = texcel + w_noise / 3.0;

	// 出力
	gl_FragColor = vec4(bg_color);
}
Scan line

画面の横線(捜査線)が表示されます。(アニメーションはしません)
fragment.glsl
/*fragment.glsl*/
uniform sampler2D tDiffuse; /*表示される画像*/
uniform float time;
varying vec2 vUv;

void main() {
 	vec2 uv = vUv;

	vec4 texcel = texture2D( tDiffuse, uv);
	//
	float Shima = abs(sin(gl_FragCoord.y * .8)) / 5.0;
	vec4 bg_color = texcel + Shima;

	// 出力
	gl_FragColor = vec4(bg_color);
}
Shake

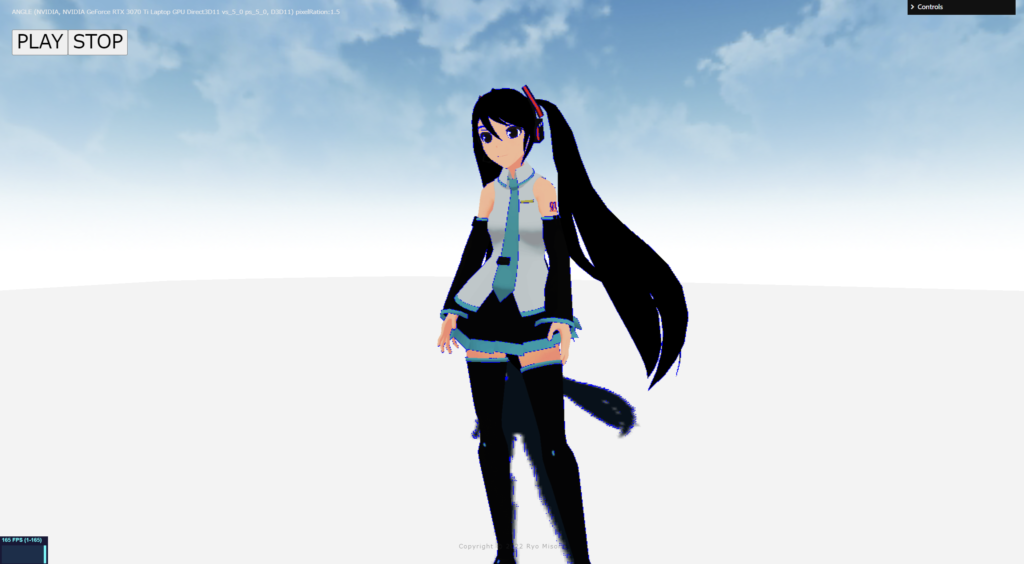
常にランダムに振動するものです。
fragment.glsl
/*fragment.glsl*/
uniform sampler2D tDiffuse; /*表示される画像*/
uniform float time;
varying vec2 vUv;

uniform vec2 u_resolution;

//float random (vec2 coord) {
//    return fract(sin(dot(coord.xy, vec2(12.9898,78.233)))*43758.5453123);
//}

highp float random (vec2 co){
    highp float a = 12.9898;
    highp float b = 78.233;
    highp float c = 43758.5453;
    highp float dt= dot(co.xy ,vec2(a,b));
    highp float sn= mod(dt,3.14);
    return fract(sin(sn) * c);
}

void main() {
 	vec2 uv = vUv;

	//Shake
	vec2 shake = vec2( random( vec2(time) ) - 0.5,  random(vec2(time * 2.0)) - 0.5 ) * 15.0 / u_resolution;

	vec4 texcel = texture2D( tDiffuse, uv + shake);
	vec4 bg_color = texcel;

	// 出力
	gl_FragColor = vec4(bg_color);
}
Camera shake
手ブレする感じをノイズを使って、演出しています。
fragment.glsl
/*fragment.glsl*/
uniform sampler2D tDiffuse; /*表示される画像*/
uniform float time;
varying vec2 vUv;

uniform vec2 u_resolution;

//float random (vec2 coord) {
//    return fract(sin(dot(coord.xy, vec2(12.9898,78.233)))*43758.5453123);
//}
highp float random (vec2 co){
    highp float a = 12.9898;
    highp float b = 78.233;
    highp float c = 43758.5453;
    highp float dt= dot(co.xy ,vec2(a,b));
    highp float sn= mod(dt,3.14);
    return fract(sin(sn) * c);
}

float interpolation(float f)
{
	return f * f * f * (f * (6.0 * f - 15.0) + 10.0);
}
float Valuenoise_(vec2 uv)
{
	uv *= 1.0;//細かくできる
	vec2 i_uv = floor(uv);
	vec2 f_uv = fract(uv);
	float f1 = random(i_uv + vec2(0.0, 0.0));
	float f2 = random(i_uv + vec2(1.0, 0.0));
	float f3 = random(i_uv + vec2(0.0, 1.0));
	float f4 = random(i_uv + vec2(1.0, 1.0));
	float v = mix(
		mix(f1, f2, interpolation(f_uv.x)),
		mix(f3, f4, interpolation(f_uv.x)),
		interpolation(f_uv.y));
	return v;
}


void main() {
 	vec2 uv = vUv;

	//Camera Shake
	vec2 camerashake = vec2( 10.0 ) * vec2(  Valuenoise_( vec2(time) ) - 0.5,  Valuenoise_(vec2(time * 2.0)) - 0.5  ) / u_resolution;

	vec4 texcel = texture2D( tDiffuse, uv + camerashake);
	vec4 bg_color = texcel;

	// 出力
	gl_FragColor = vec4(bg_color);

}
Scaling
常にランダムに拡大します。timeの値を整数にして、変化をゆっくりにしています。
fragment.glsl
/*fragment.glsl*/
uniform sampler2D tDiffuse; /*表示される画像*/
uniform float time;
varying vec2 vUv;

uniform vec2 u_resolution;


//float random (vec2 st) {
//    return fract(sin(dot(st.xy,vec2(12.9898,78.233)))*43758.5453123);
//}

highp float random (vec2 co){
    highp float a = 12.9898;
    highp float b = 78.233;
    highp float c = 43758.5453;
    highp float dt= dot(co.xy ,vec2(a,b));
    highp float sn= mod(dt,3.14);
    return fract(sin(sn) * c);
}


mat2 scale(vec2 _scale){
    return mat2(_scale.x,0.0,0.0,_scale.y);
}

void main() {
 	vec2 uv = vUv;

	// 変数作成
	float i = floor(time*2.0);  // 整数
	float floorNoise = random(vec2(i)); //0~1で

	// 拡縮
	uv -= vec2(0.5);
    uv = scale( vec2( floorNoise ) ) * uv;
    uv += vec2(0.5);

	vec4 texcel = texture2D( tDiffuse, uv);
	vec4 bg_color = texcel;

	// 出力
	gl_FragColor = vec4(bg_color);
}
OutLine(Depth)

Depthmapから、輪郭を抽出して表示させているOutLinePassです。RenderTargetを使います。高負荷である可能性があります。使うときは要注意でお願いします。
輪郭線の抽出には、以下のサイトを参考にさせていただきました。
床井研究室

three.js
if ( renderer.capabilities.isWebGL2 === false && renderer.extensions.has( 'WEBGL_depth_texture' ) === false ) {
  supportsExtension = false;
  window.alert("Error:WEBGL_depth_texture");
  return;
}

const target = new THREE.WebGLRenderTarget(
  window.innerWidth, window.innerHeight,
  {
    magFilter: THREE.NearestFilter,
    minFilter: THREE.NearestFilter,
    wrapS: THREE.ClampToEdgeWrapping,
    wrapT: THREE.ClampToEdgeWrapping,
    depthBuffer: true,
    stencilBuffer: false,
    depthTexture: new THREE.DepthTexture(),
  }
);
const effectComposer = new EffectComposer( renderer );
//現在のシーン
effectComposer.addPass(new RenderPass(scene, camera));
effectComposer.setPixelRatio(PixelRation);
effectComposer.setSize( window.innerWidth, window.innerHeight );
//1)My PostProcessing Shader
const PostProcessingShader = {
uniforms: {
tDiffuse: { type:"t", value:null },
time: { value: 0.0 },
//
u_resolution: { value: new THREE.Vector2(window.innerWidth, window.innerHeight)},
tDepth: { type:"t", value: null },
cameraNear: {value: camera.near},
cameraFar: {value: camera.far },
},
vertexShader: Vertex,
fragmentShader: Fragment,
};
const MyEffectPass = new ShaderPass(PostProcessingShader);
effectComposer.addPass(MyEffectPass);const clock = new THREE.Clock();
function rendeLoop() {
//stats.begin();//stats計測
const delta = clock.getDelta();//animation programs
const elapsedTime = clock.getElapsedTime();
renderer.setRenderTarget( target );
renderer.render(scene,camera);
//
MyEffectPass.material.uniforms.tDepth.value = target.depthTexture;
renderer.setRenderTarget( null );
//
effectComposer.render();
requestAnimationFrame(rendeLoop) //loop the render function
//stats.end();//stats計測
}
rendeLoop() //start renderingfragment.glsl
/*fragment.glsl*/
#include <packing>
uniform sampler2D tDiffuse; /*表示される画像*/
uniform sampler2D tDepth;
uniform float cameraNear;
uniform float cameraFar;

uniform float time;
varying vec2 vUv;

uniform vec2 u_resolution;

float readDepth( sampler2D depthSampler, vec2 coord ) {
	float fragCoordZ = texture2D( depthSampler, coord ).x;
	float viewZ = perspectiveDepthToViewZ( fragCoordZ, cameraNear, cameraFar );
	return viewZToOrthographicDepth( viewZ, cameraNear, cameraFar );
}

float random (vec2 st) {
    return fract(sin(dot(st.xy,vec2(12.9898,78.233)))*43758.5453123);
}

// const float dx = 0.001953125; // 1 / 512
// const float dy = 0.001953125; // 1 / 512
const float dx = 0.00078125; // 1 / 1280
const float dy = 0.00078125; // 1 / 1280

float peek(const in float x, const in float y)
{
  return texture2D(tDepth, vec2(x, y)).r;
}

void main() {
 	vec2 uv = vUv;

	float x = vUv.x;
	float y = vUv.y;
	mat3 m = mat3(
		peek(uv.x - dx, uv.y - dy), peek(uv.x, uv.y - dy), peek(uv.x + dx, uv.y - dy),
		peek(uv.x - dx, uv.y     ), peek(uv.x, uv.y     ), peek(uv.x + dx, uv.y     ),
		peek(uv.x - dx, uv.y + dy), peek(uv.x, uv.y + dy), peek(uv.x + dx, uv.y + dy)
	);
	vec2 h = vec2(
		m[0][0] - m[0][2] + (m[1][0] - m[1][2]) * 2.0 + m[2][0] - m[2][2],
		m[0][0] - m[2][0] + (m[0][1] - m[2][1]) * 2.0 + m[0][2] - m[2][2]
	);

	float d = 1.0 - length(h);

	vec4 bg_color = vec4(0.0, 0.902, 0.8118, 1.0);

	if( d*d > 0.98){
		bg_color = texture2D( tDiffuse, uv);
	}

	// 出力
	gl_FragColor = vec4(bg_color);
}
Outline(fwidth)
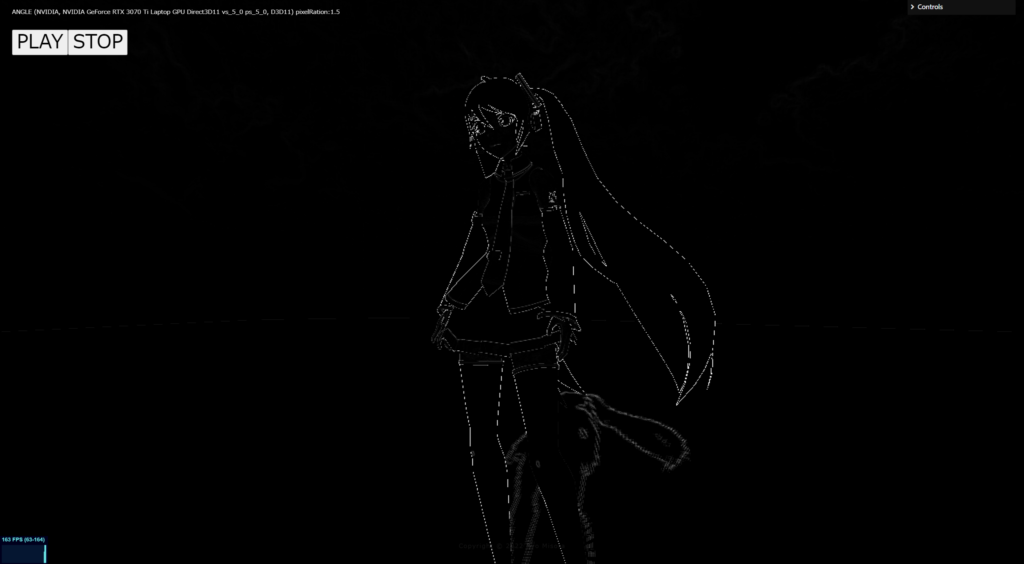
/*fragment.glsl*/
uniform sampler2D tDiffuse; /*表示される画像*/
uniform float time;
varying vec2 vUv;

void main() {
 	vec2 uv = vUv;

    vec4 color =  texture2D(tDiffuse, uv);
	// grayscay
	vec3 NTSC = vec3(0.298912,0.586611,0.114478);
	float gray = dot(color.rgb, NTSC);

	float col = fwidth(gray);
	//vec4 fragColor = vec4(vec3(step(0.1, fwidth(gray))), 1.0);

	if( col > 0.2 ){
		color = vec4(0.0, 0.0, 1.0, 1.0);
	}

	gl_FragColor = color;
}
そのほか
そのほかのテクニックが掲載されているサイトを紹介します。素晴らしいサイトなので、ぜひ参考にしてみてください。
ICS Media
次回も予定しています。もし良ければもう一つ記事を読んでいただき、Xをフォローしていただけると嬉しいです。