よく皆様さんが地球を作っているようだったので、私もリアルな地球を作ってみました。基礎的なものですが、Demoにある地球の作り方を紹介しようと思います。
Photoshopとshaderが使える中級者向け?の内容となります。
【Demo】 https://misora.main.jp/earth01/
1.下準備(Textureの作成)
地球を作るにはテクスチャが必要なので、NASAからテクスチャ画像をお借りしました。以下から参照ください。
ImageMap: https://visibleearth.nasa.gov/images/74092/july-blue-marble-next-generation
normalMap: https://visibleearth.nasa.gov/images/73934/topography
SpecularMap: https://visibleearth.nasa.gov/images/73963/bathymetry
LightMap: https://visibleearth.nasa.gov/images/55167/earths-city-lights
CloudMap: https://visibleearth.nasa.gov/images/57747/blue-marble-clouds
NASA Visible Earth


ダウンロードした画像をPhotoshopを使って、使いやすいように加工していきます。出力サイズは、おのおので調整してください。
ImageMap
ダウンロードした画像をPhotoshopでトーンカーブを使い、調整します。(world.topo.200407.jpg)

normalMap
ダウンロードした画像をPhotoshopでPNG出力してから、以下のサイトを使って、normalマップを出力します。サイズは小さくて問題ありません。(NormalMap.png)
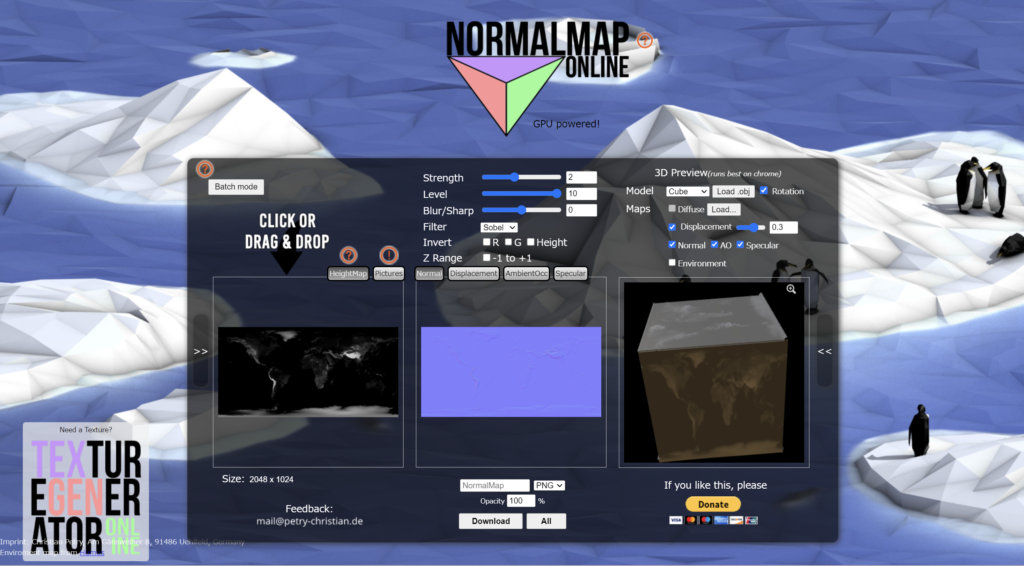
NormalMap-Online

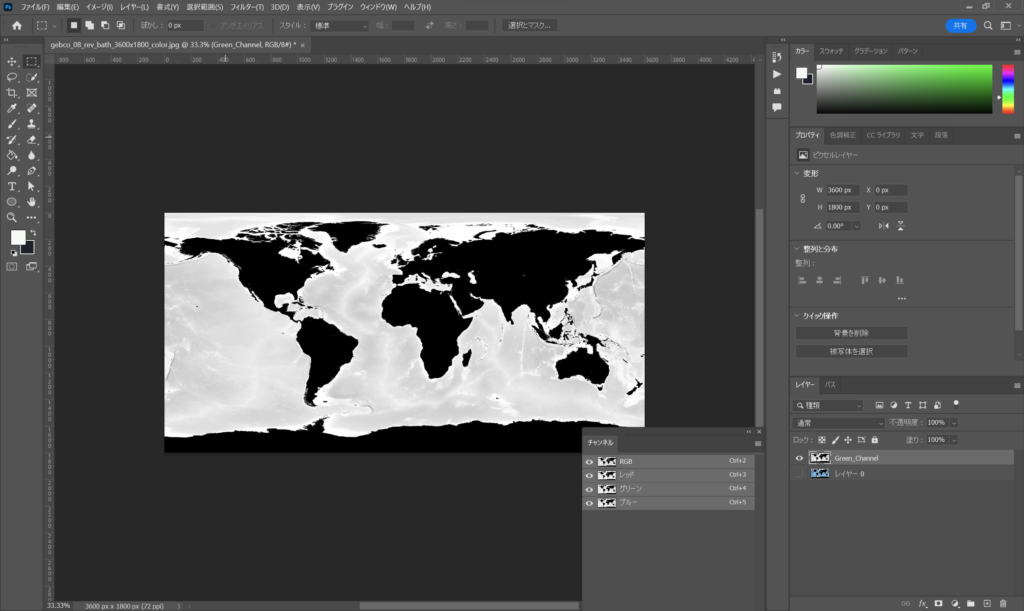
SpecularMap
ダウンロードした画像をPhotoshopでチャンネル表示して、Greenチャンネルだけ出力します。サイズは小さくて問題ありません。(specularMap.png)
LightMap
ダウンロードした画像をPhotoshopでトーンカーブを使い、以下のように暗い画像にします。サイズは小さくて問題ありません。(lightMap.jpg)

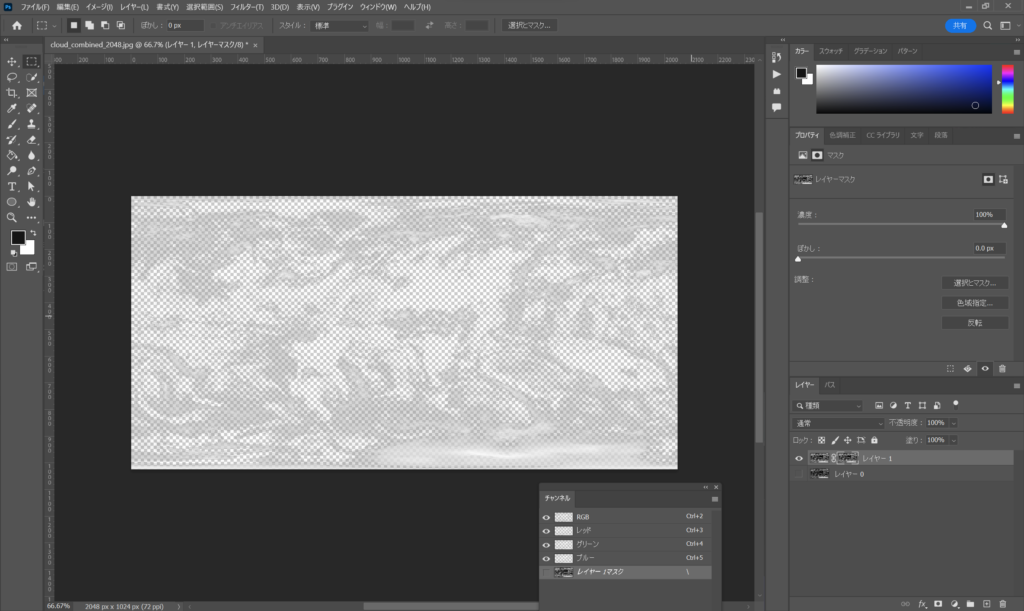
CloudMap
ダウンロードした画像をPhotoshopでチャンネル表示して、Redチャンネルをコピーして、Redチャンネルでマスクをして、透明度付きの画像を作成します。(cloudMap.png)
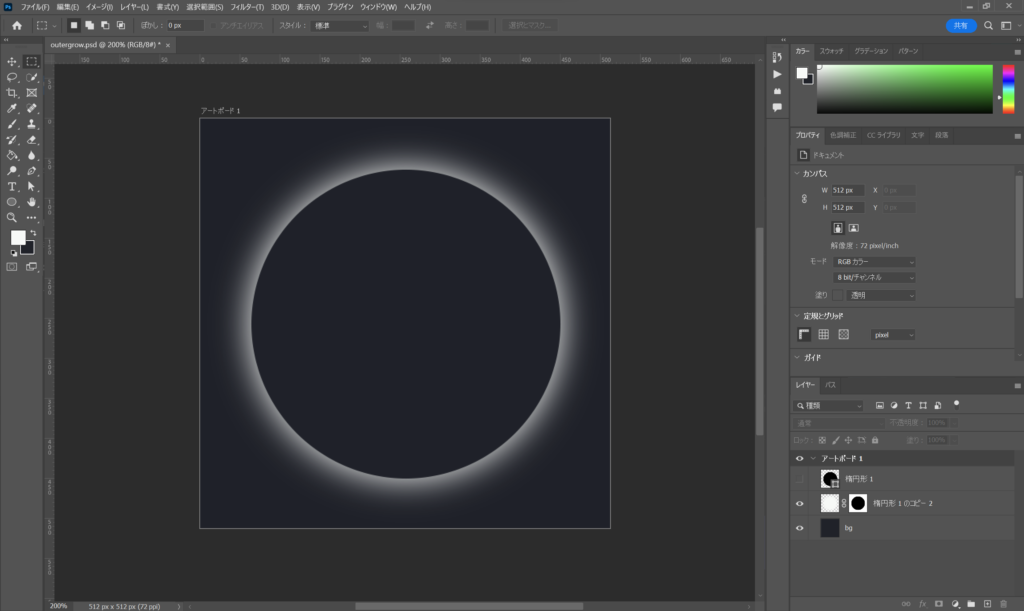
OuterGrow
地球のグロー用に、以下の透明な画像(512×512)を作成します。(outgrow.png)
以上、テクスチャ作成は終了です。
2.地球を作る
地球を作るのに必要となるのは、Lightと4つのMeshだけです。Meshは、地球テクスチャのメインの球体、雲の球体、InnerGrow用の球体とOuterGrow用の平面になります。
Light (SpotLight)
three.js
// 環境光源
const light = new THREE.AmbientLight(0xFFFFFF, 0.001);
scene.add(light);

// スポットライト
const spotLight = new THREE.SpotLight(0xfffdfa, 5, 35, Math.PI/8, 1.0, 1.0);
spotLight.position.set( 18, -0.4, 18 );
scene.add(spotLight);
// Helper
const spotLightHelper = new THREE.SpotLightHelper( spotLight );
spotLightHelper.visible = true;
scene.add( spotLightHelper );
地球テクスチャのメインの球体
three.js
const E_geometry = new THREE.SphereGeometry( 5, 128, 64 );
const E_material = new THREE.MeshPhongMaterial( {
  color: 0xFFFFFF,
  map: new THREE.TextureLoader().load("world.topo.200407.jpg"),//Texture画像
  normalMap: new THREE.TextureLoader().load("NormalMap.png"),//Texture画像
  specularMap : new THREE.TextureLoader().load("specularMap.png"),//Texture画像
  shininess : 100,
  lightMap : new THREE.TextureLoader().load("lightMap.jpg"),//Texture画像
  lightMapIntensity : 0.4,
 } );

const Esphere = new THREE.Mesh( E_geometry, E_material );
Esphere.rotation.y = Math.PI / 180 * 100;
Esphere.rotation.z  = Math.PI / 180 * 23.4;
scene.add( Esphere );
雲の球体
three.js
const c_geometry = new THREE.SphereGeometry( 5.08, 128, 64 );
const c_material = new THREE.MeshPhongMaterial( {
  color: 0xFFFFFF,
  map: new THREE.TextureLoader().load("cloudMap.png"),//Texture画像
  transparent:true,
 } );

const cloud = new THREE.Mesh(c_geometry, c_material);
cloud.position.set(0, 0, 0);
cloud.rotation.z  = Math.PI / 180 * 23.4;
scene.add( cloud );
InnerGrowの球体

three.js
import Vertex from "./vertex.glsl";
import Fragment from "./fragment.glsl";
const geometry = new THREE.SphereGeometry( 5.12, 128, 64 );
const material = new THREE.ShaderMaterial({
uniforms : {
viewVector: { value: new THREE.Vector3(0, 0, 20)},//initial camera.position
uColor: { value: new THREE.Color(0x42a9f1)},// GrowColor
},
vertexShader:Vertex,
fragmentShader: Fragment,
blending: THREE.CustomBlending,
transparent:true,
});
const plane = new THREE.Mesh(geometry, material);
plane.position.set(0, 0, 0);
scene.add( plane );vertex.glsl
//vertex.glsl
uniform vec3 viewVector;// CameraPosition
varying vec2 vUv;
varying float opacity;

void main() {
  vUv = uv;

  vec4 worldPosition = modelMatrix * vec4( position, 1.0 );
  vec4 mvPosition =  viewMatrix * worldPosition;
  gl_Position = projectionMatrix * mvPosition;
  //
  vec3 nNomal = normalize(normal);
  vec3 nViewVec = normalize(viewVector);
  opacity = dot(nNomal, nViewVec);
  opacity = 1.0 - abs(opacity*1.3);
}
fragment.glsl
// fragment.glsl
uniform vec3 uColor;
varying vec2 vUv;
varying float opacity;

void main()
{
  gl_FragColor = vec4(uColor, opacity);
}
OuterGrowの平面
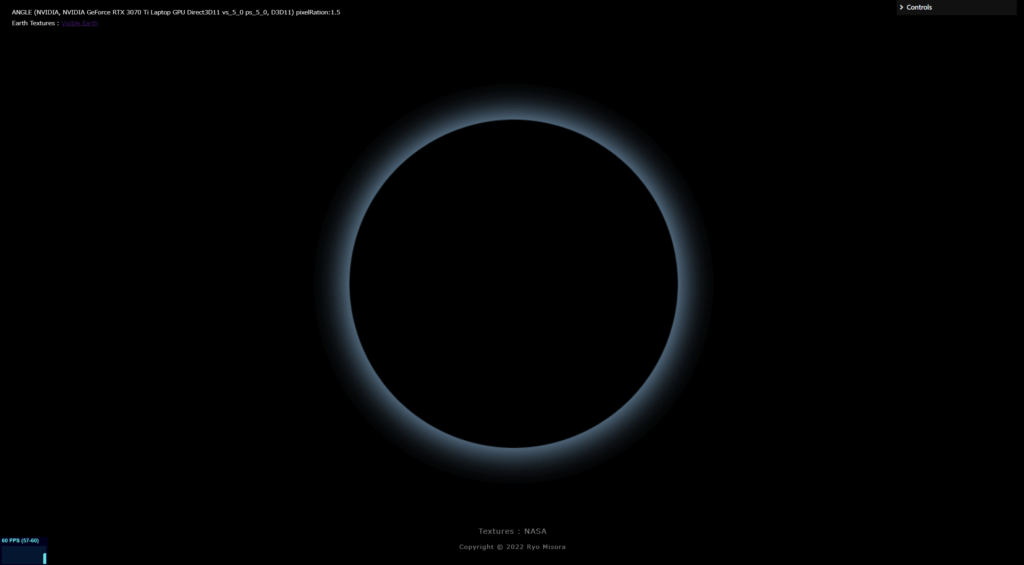
three.js
const out_material = new THREE.SpriteMaterial({
  map: new THREE.TextureLoader().load("outgrow.png"),//Texture画像
  color: 0x8cc6ef, // GrowColor
  blending: THREE.AdditiveBlending,
  transparent: true
});

const sprite = new THREE.Sprite(out_material);// Billboard
sprite.scale.multiplyScalar(13.5);//調整ください
scene.add( sprite );
Animation
地球の回転と雲の回転、InnerGrowのためにデータを更新します。
three.js
const clock = new THREE.Clock();
function rendeLoop() {
//stats.begin();//stats計測
const delta = clock.getDelta();//animation programs
//InnerGrow Material
material.uniforms.viewVector.value = camera.position;
material.uniformsNeedUpdate = true;
//Earth rotation
Esphere.rotation.y += delta / 30; // Speedを調整ください
//Cloud rotation
cloud.rotation.y += delta / 26; // Speedを調整ください
renderer.render(scene, camera) // render the scene using the camera
requestAnimationFrame(rendeLoop) //loop the render function
//stats.end();//stats計測
}
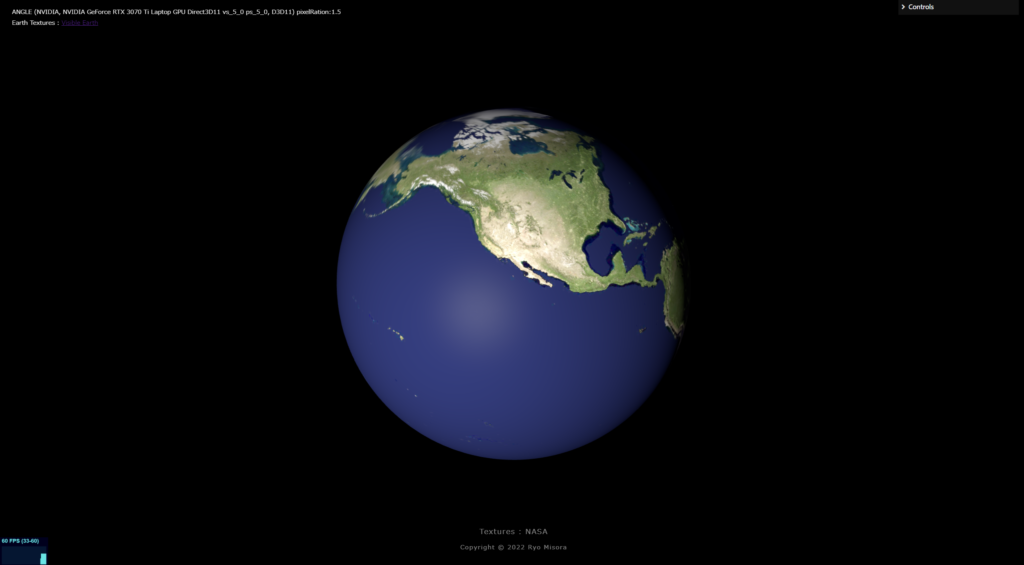
rendeLoop() //start rendering3.完成!

簡単でしたね!
素材が良いと、段違いにクオリティが高くなりますね。
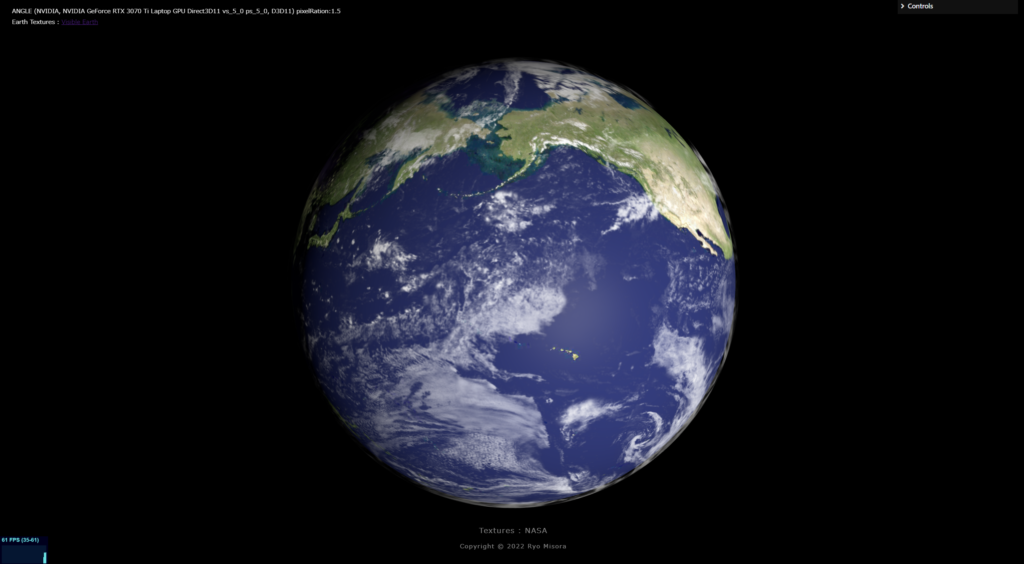
【Demo】 https://misora.main.jp/earth01/
デモでは、CameraはOrbitControlsを使い、GsapでAnimationをつけています。また、太陽を表示して、Partcleを使って周りの星々を表現しています。Partcleに関しては、前に書いた記事を参考にしてください。

以上、リアルな?地球の作り方でした。ありがちなものですが、私も地球の作り方に挑戦してみました。もっと難しいものが作れるように、頑張りたいです。
良かったらXのフォロー、また、もう一つ私の記事をご覧ください。