Cannon-esの基本的な使い方を、備忘録として記事にしました。まだまだ使い慣れていませんが、よろしくお願いします。
以下は、Cannon-esを使ったサンプルと作品サイトになります。
【Demo ClickBall】https://misora.main.jp/cannonestest1/
【Demo Domino】https://misora.main.jp/cannonestest2/
【作品「風が吹く窓」】https://misora.main.jp/cannones1/
詳しいリファレンスやサンプルなどはCannon-esの公式サイトをご覧ください。
cannon-es

1.Set up
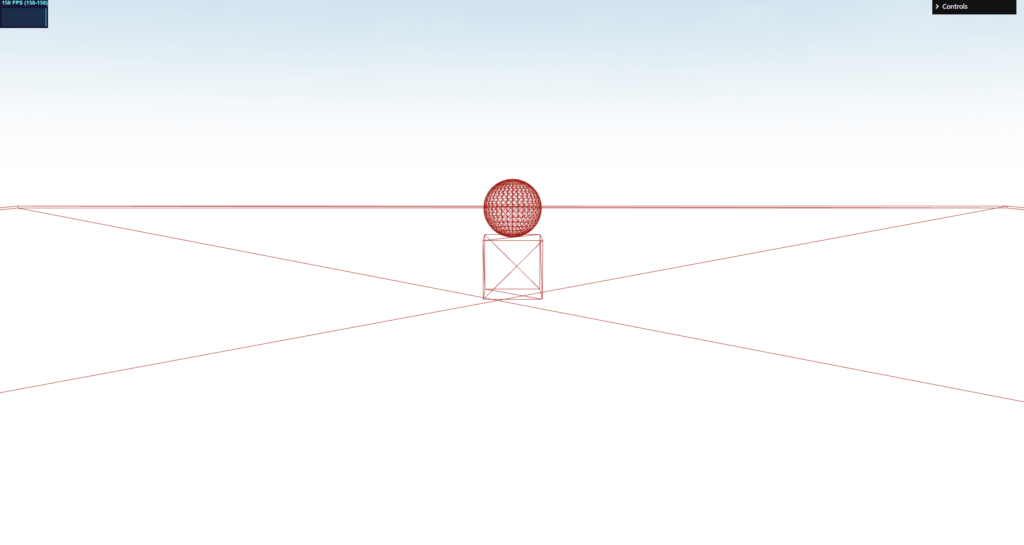
まずは基本的なものをセットアップしていきます。上のイメージあるような、球体、Cube、地面を作成したいと思います。ワイヤーフレーム表示なのはcannon-es-debuggerのせいです。
Cannon-esは、外部のAPIなのでnpm でインストールしていきましょう。以下の2つをインストールしてください。
cannon-es

cannon-es-debugger

three.js
import * as CANNON from 'cannon-es'
import CannonDebugger from 'cannon-es-debugger'
環境設定
const world = new CANNON.World({
  gravity: new CANNON.Vec3(0, -9.82, 0), // 0, -9.8, 0 m/s²
})
// 反復計算回数
world.solver.iterations = 5;
// 許容値
world.solver.tolerance = 0.1;
// world内でのスリープ状態を有効
world.allowSleep = true;

//debug
const cannonDebugger = new CannonDebugger(scene, world, {
  color: 0xaa0000, //Red
})
球体
// Sphere
const radius = 1 // m
const sphereMat = new CANNON.Material('sphereMat');
const ssphereBody = new CANNON.Body({
  mass: 5, // kg
  shape: new CANNON.Sphere(radius),
  material: sphereMat,
})
ssphereBody.position.set(0, 7, 0); // 初期位置
ssphereBody.angularVelocity.set(0,4,0); // 回転がかかる
ssphereBody.angularDamping = 0.5; // 回転の減衰率
ssphereBody.linearDamping = 0.1; // 通常の減衰率
//
ssphereBody.allowSleep = true;
ssphereBody.sleepSpeedLimit = 0.1 // Body will feel sleepy if speed<1 (speed == norm of velocity)
ssphereBody.sleepTimeLimit = 1 // Body falls asleep after 1s of sleepiness
world.addBody(ssphereBody);

ssphereBody.addEventListener('sleepy', (event) => {
  //console.log('The sphere is feeling sleepy...')
})
ssphereBody.addEventListener('sleep', (event) => {
  console.log('The sphere fell asleep!')
})
ssphereBody.addEventListener("wakeup",function(event){
  console.log("The sphere woke up!");
  //ssphereBody.wakeUp();
});
Cube
// Cube
const cubeMat = new CANNON.Material('cubeMat');
const BBoxBody = new CANNON.Body({
  mass: 5, // kg
  shape: new CANNON.Box(new CANNON.Vec3(1, 1, 1)),
  material: cubeMat,
})
BBoxBody.position.set(0, 3, 0) // 初期位置
BBoxBody.angularVelocity.set(0,4,0) // 回転がかかる
BBoxBody.angularDamping = 0.5 // 回転の減衰率
BBoxBody.linearDamping = 0.1; // 通常の減衰率
//
BBoxBody.allowSleep = true;
BBoxBody.sleepSpeedLimit = 0.1 // Body will feel sleepy if speed<1 (speed == norm of velocity)
BBoxBody.sleepTimeLimit = 1 // Body falls asleep after 1s of sleepiness

world.addBody(BBoxBody);

BBoxBody.addEventListener('sleepy', (event) => {
  //console.log('The Box is feeling sleepy...')
})
BBoxBody.addEventListener('sleep', (event) => {
  console.log('The Box fell asleep!')
})
BBoxBody.addEventListener("wakeup",function(event){
  console.log("The Box woke up!");
  //BBoxBody.wakeUp();
});
地面
// Ground
const groundMat = new CANNON.Material('groundMat');    //マテリアルを作成
//const wallShape = new CANNON.Plane();
const wallShape = new CANNON.Box(new CANNON.Vec3(20, 20, 0.1))
const wallBody = new CANNON.Body({
  type: CANNON.Body.STATIC, // CANNON.Body.DYNAMIC,
  shape: wallShape,
  //mass: 0,
  position: new CANNON.Vec3( 0, 0, 0 ),
  material: groundMat,
});
wallBody.position.set(0,0,0);
wallBody.quaternion.setFromEuler(-Math.PI / 2, 0, 0)

world.addBody(wallBody);
地面と球体、地面とCubeの関係性をマテリアルで定義します。
const cubeGroundCM_A = new CANNON.ContactMaterial(groundMat, sphereMat, {
  friction: 0.8,//摩擦係数
  restitution: 0.5,//反発係数
  contactEquationStiffness: 1e8,
  contactEquationRelaxation: 3,
  frictionEquationStiffness: 1e8,
  frictionEquationRegularizationTime: 3,
})
// Add contact material to the world
world.addContactMaterial(cubeGroundCM_A)

const cubeGroundCM_B = new CANNON.ContactMaterial(groundMat, cubeMat, {
  friction: 0.2,//摩擦係数
  restitution: 1.0,//反発係数
  contactEquationStiffness: 1e8,
  contactEquationRelaxation: 3,
  frictionEquationStiffness: 1e8,
  frictionEquationRegularizationTime: 3,
})
// Add contact material to the world
world.addContactMaterial(cubeGroundCM_B)
Loopを回してアニメーションさせます。
const clock = new THREE.Clock();
const timestep = 1/60;

function renderLoop() {
    //stats.begin();//stats計測
    const delta = clock.getDelta();//animation programs
    const elapsedTime = clock.getElapsedTime();

    // Run the simulation independently of framerate every 1 / 60 ms
    //world.fixedStep()
    world.step(timestep, delta, 10);//
    cannonDebugger.update();  //debug用

    renderer.render(scene, camera) // render the scene using the camera

    requestAnimationFrame(renderLoop) //loop the render function
    //stats.end();//stats計測
}

renderLoop() //start rendering
一応、基本的なものはこれで完了です。
Sleepは、オブジェクトが静止した呼ばれるメソッドです。なんらかの力が加わると、wakeupが起動して動き始めます。必要なければ削除して問題ありません。
2.Click to add and remove
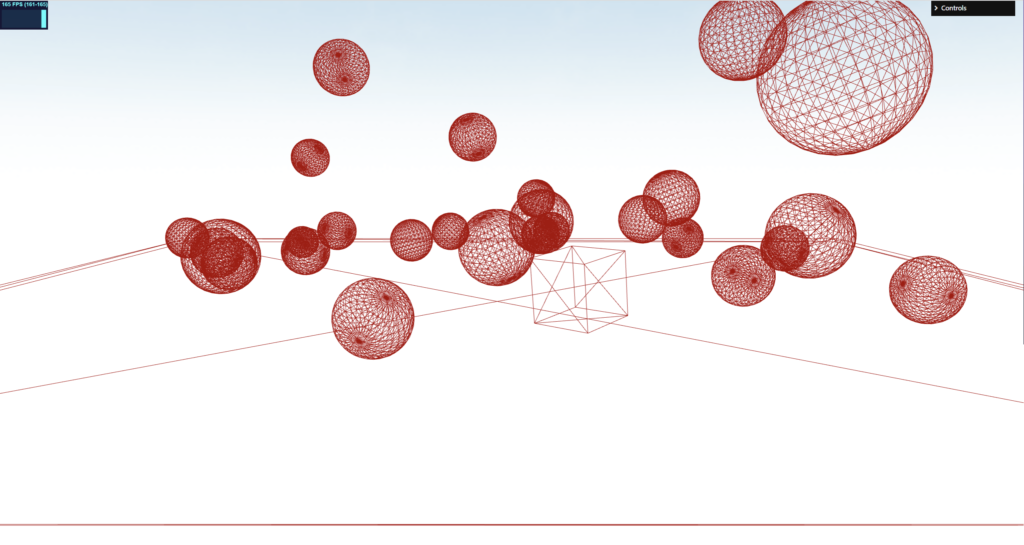
Canvasをクリックしたら、上から球体が増えていき、地面化から落ちる球体は削除するようにしたいと思います。
three.js
クリックしたら球体が追加される
const collideBody =[];
let id = 0; //contactmaterialsを削除するのに使う

document.getElementById("MyCanvas").addEventListener("click", () => function(){
  console.log("click");

  const sphereMat = new CANNON.Material('sphereMat');

  const ssphereBody = new CANNON.Body({
    mass: 5, // kg
    shape: new CANNON.Sphere(radius),
    material: sphereMat,
  })
  ssphereBody.position.set(0, 8, 0); // m
  ssphereBody.angularVelocity.set(4,4,0); // 回転がかかる
  ssphereBody.angularDamping = 0.5; // 減衰
 ssphereBody.linearDamping = 0.1; // 通常の減衰率
  //
  ssphereBody.allowSleep = true;
  ssphereBody.sleepSpeedLimit = 0.1 // Body will feel sleepy if speed<1 (speed == norm of velocity)
  ssphereBody.sleepTimeLimit = 1 // Body falls asleep after 1s of sleepiness
  ssphereBody.id = 'A' + id;
  world.addBody(ssphereBody);
  //
  collideBody.push(ssphereBody);


  const cubeGround = new CANNON.ContactMaterial(groundMat, sphereMat, {
    friction: 0.8,//摩擦係数
    restitution: 0.8,//反発係数
    contactEquationStiffness: 1e8,
    contactEquationRelaxation: 3,
    frictionEquationStiffness: 1e8,
    frictionEquationRegularizationTime: 3,
  })
  cubeGround.id = 'A' + id;
  // Add contact material to the world
  world.addContactMaterial(cubeGround);

  id++;
}());
地面の下に、大きな判定用の地面を作って、衝突したら球体を消すようにします。
const CollideShape = new CANNON.Box(new CANNON.Vec3(100, 100, 0.1))
const triggerBody = new CANNON.Body({ isTrigger: true })
triggerBody.addShape(CollideShape)
triggerBody.position.set(0, -60, 0);
triggerBody.quaternion.setFromEuler(-Math.PI / 2, 0, 0);
world.addBody(triggerBody)

// remove target&Material
let removetarget = null; //複数ならArrayに設定してください
let removeContactMaterial = null; //複数ならArrayに設定してください

// It is possible to run code on the exit/enter
triggerBody.addEventListener('collide', (event) => {

  //配列の格納したものがどうかを全部調べる
  for(let i = 0 ; i < collideBody.length; i++){
    if (event.body === collideBody[i]) {
      //console.log('The sphere collided the trigger!', event);

      removetarget = event.body;//抜け落ちる場合は配列にする

      //マテリアルの削除
      for(let j = 0 ; j < world.contactmaterials.length; j++){
        if(world.contactmaterials[j].id === event.body.id){
          removeContactMaterial = world.contactmaterials[j];
        }
      }

      collideBody.splice(i, 1); // 配列から削除予定のものを取り除く
    }
  }

})
const clock = new THREE.Clock();
const timestep = 1/60;
function renderLoop() {
//stats.begin();//stats計測
const delta = clock.getDelta();//animation programs
const elapsedTime = clock.getElapsedTime();
// Run the simulation independently of framerate every 1 / 60 ms
//world.fixedStep()
world.step(timestep, delta, 10);//
cannonDebugger.update(); //debug用
//削除するオブジェクトがあるか判定
if(removetarget){
world.removeBody(removetarget);
world.removeContactMaterial(removeContactMaterial);
removetarget= null;
removeContactMaterial = null;
//console.log(world); // remove check!
}
renderer.render(scene, camera) // render the scene using the camera
requestAnimationFrame(renderLoop) //loop the render function
//stats.end();//stats計測
}
renderLoop() //start renderingこれで、クリックしたら球体は追加されて、バウンドして落ちた球体はコリジョン判定で消えます。コリジョンで判定された、削除する球体を変数(removetarget)に渡して、Loop内で削除します。数が多くなって消えないものが現れた場合、変数(removetarget)を配列にして、配列を渡すことで解決してください。
3.Work with dominoes created in Blender
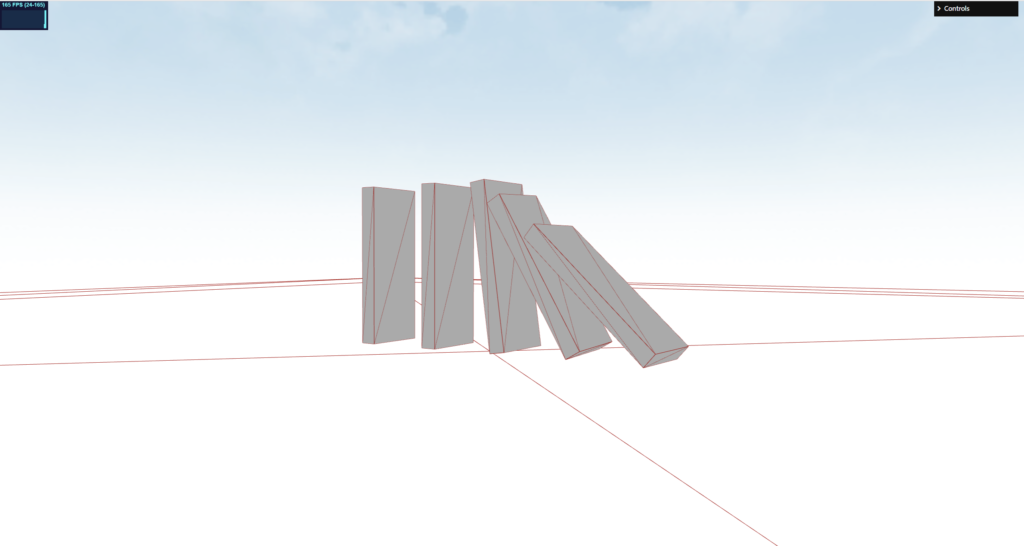
Blenderで作成したドミノのメッシュに、cannon-esを適用して、ドミノが崩れていくものをシミュレーションしようと思います。
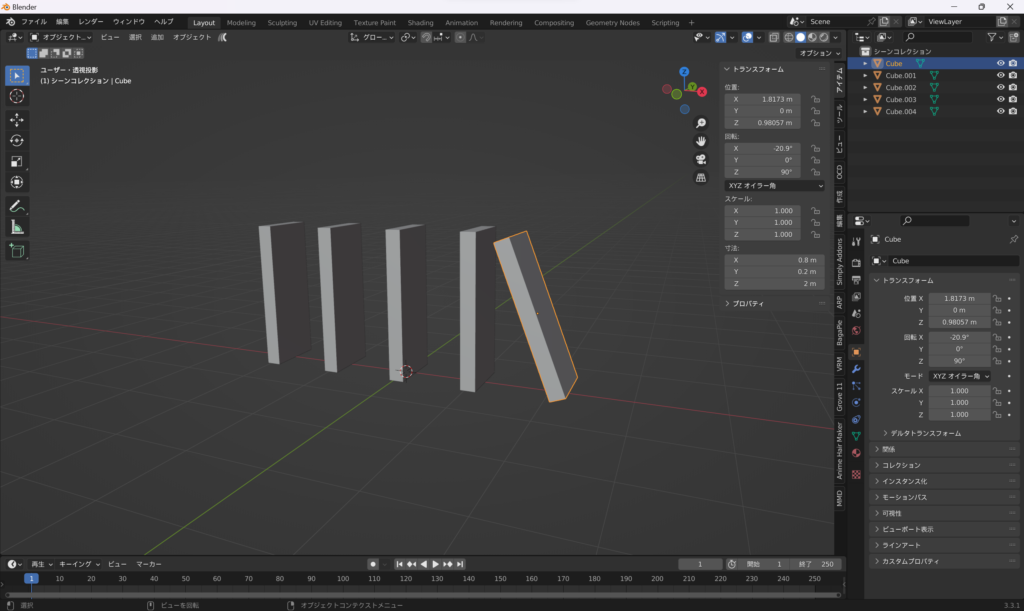
Blenderで上記のように、適当なオブジェクトと、開始時に倒れてもらえるように、1つだけ斜めにしておきました。これを.glb(domino.glb)で出力して、読み込ませていきます。
three.js
import { GLTFLoader } from 'three/examples/jsm/loaders/GLTFLoader.js'
import { DRACOLoader } from 'three/examples/jsm/loaders/DRACOLoader.js'
const dracoLoader = new DRACOLoader()
const Modelloader = new GLTFLoader()
dracoLoader.setDecoderPath('https://www.gstatic.com/draco/v1/decoders/')
dracoLoader.setDecoderConfig({ type: 'js' })
Modelloader.setDRACOLoader(dracoLoader)let modelSet = false; //モデルの読み込みが完了したかのフラグ
const obj = []; // 更新用
const threeobj = []; //更新用
let dd = 0;
//読み込ませるデータを準備する
async function loadBlender() {
const [modelData] = await Promise.all([
Modelloader.loadAsync('domino.glb'),
]);
const model = modelData.scene;
//
return { model, modelData };
}
async function modelinit() {
const { model, modelData } = await loadBlender();
// バグるので動かさないほうが良い
//model.scale.set(2,2,2);
//model.position.set(0, -10, 10);
//model.rotateX = Math.PI;
model.traverse((object) => { //モデルの構成要素をforEach的に走査
if(object.isMesh) { //その構成要素がメッシュだったら
console.log(object);
object.material = new THREE.MeshBasicMaterial({color: 0xaaaaaa,})
let material = new CANNON.Material({
friction: 0.05,
restitution: 0.05,
});
let boxshape = new CANNON.Box(
new CANNON.Vec3(
((object.geometry.boundingBox.max.x - object.geometry.boundingBox.min.x) / 2 ) * object.scale.x,
((object.geometry.boundingBox.max.y - object.geometry.boundingBox.min.y) / 2 ) * object.scale.y,
((object.geometry.boundingBox.max.z - object.geometry.boundingBox.min.z) / 2 ) * object.scale.z,
)
);
let boxBody = new CANNON.Body({
mass: 10,
shape: boxshape,
//material: material,
});
boxBody.position.set(
object.position.x * model.scale.x + 0,
object.position.y * model.scale.y + 0,
object.position.z * model.scale.z + 0,
);
boxBody.quaternion.set(
object.quaternion.x ,
object.quaternion.y ,
object.quaternion.z ,
object.quaternion.w ,
);
boxBody.id = "B" + dd;
world.addBody(boxBody);
obj.push(boxBody);
object.position.copy(boxBody.position);
object.name = "B" + dd;
threeobj.push(object);
dd++;
}
});
scene.add( model );
modelSet = true;
}//End modelinit
modelinit();//位置などを更新する
function updateMesh(){
obj.forEach((element, index, array) => {
threeobj[index].position.copy(element.position);
threeobj[index].quaternion.copy(element.quaternion);
});
}const clock = new THREE.Clock();
const timestep = 1/60;
function renderLoop() {
//stats.begin();//stats計測
const delta = clock.getDelta();//animation programs
const elapsedTime = clock.getElapsedTime();
updateMesh();
// Run the simulation independently of framerate every 1 / 60 ms
//world.fixedStep()
world.step(timestep, delta, 10);//
cannonDebugger.update(); //debug用
renderer.render(scene, camera) // render the scene using the camera
requestAnimationFrame(renderLoop) //loop the render function
//stats.end();//stats計測
}
renderLoop() //start renderingもし、うまく行かない場合は、blenderで作成したオブジェクトの位置やスケールなどの値がおかしい可能性があります。適用などをして、スケールを1に統一するなど調整ください。
three.js側で、スケールや位置を調整した場合、Three.jsのobjectとCaanon-esのobjectの調整が難しかったです。できるだけBlender側でスケールなどを調整して、読み込んだほうが良いかもしれません。
4.Finally
以上、Cannon-esの大雑把な使い方でした。次は、boneとの連携、キャラクターとの組み合わせに挑戦します。
three.jsのオブジェクトとの連携は、three.jsのオブジェクトを作成して以下のように、Loopアニメーションごとに、位置と回転をコピーして同期させます。詳しく説明できませんが、以下をご参照ください。
function updateMesh(){
  threeJS_obj.position.copy(CannonES_element.position); // Position
  threeJS_obj.quaternion.copy(CannonES_element.quaternion); // Rotation
}

function renderLoop() {
...
   updateMesh(); //update

   // Run the simulation independently of framerate every 1 / 60 ms
   world.step(timestep, delta, 10);//
   //cannonDebugger.update();  //debug用

   renderer.render(scene, camera) // render the scene using the camera
   requestAnimationFrame(renderLoop) //loop the render function
}
そのほかにも、Cannon-esではバネやクロスなど、さまざまなものの物理演算が設定できます。公式サイトなど、以下のリファレンスをご参照ください。
cannon-es


Wael Yasmina
以上、今回は終わりです。記事が良かったらXのフォロー、また、もう一つ私の記事をご覧ください。